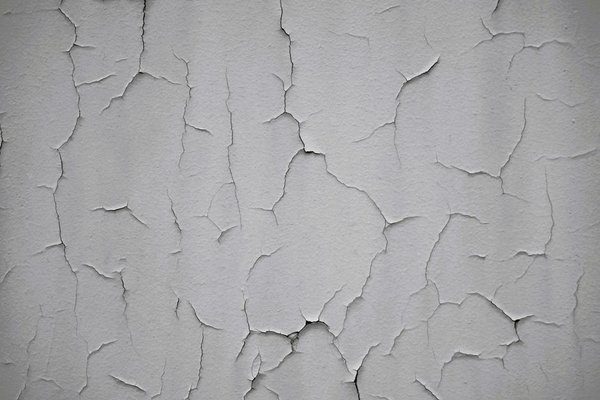
A fine crack in an otherwise smooth plaster wall can catch your eye whenever the light hits it. Fortunately, many hairline wall cracks result from ordinary drying or seasonal movement, not a serious defect. With careful preparation and suitable filler, you can usually make a small, stable crack disappear beneath fresh paint. First, though, check whether you are dealing with a cosmetic flaw or ongoing movement.
Check the Crack Before Reaching for Filler
Look at its width, direction and surroundings. A thin, fairly even crack in firm, dry plaster is often suitable for simple repair. Plaster can shrink as it dries, and temperature or humidity changes can cause slight movement where materials meet. Cracks frequently appear near ceilings, corners and openings.
Width is not the whole story. NHBC guidance describes many cracks up to around 2 mm as cosmetic, but pattern and change matter too. A crack that grows, tapers from wide to narrow, runs diagonally or in steps, or appears alongside sticking doors deserves closer assessment. Cracking visible both inside and outside a wall is another reason to seek advice.
Photograph the crack with a ruler alongside it and record the date. If you are unsure whether it is changing, observe it before decorating. Damp marks, bulging plaster or hollow-sounding areas suggest that filling alone may not solve the problem. A guide to identifying damp patches on interior walls is useful when moisture is involved.
Choose a Repair That Suits the Wall
For a stable crack in modern gypsum plaster, fine-surface interior filler is generally the simplest choice. Check that the product suits plaster and the crack’s width and depth. Ready-mixed filler is convenient for tiny repairs; powder filler may suit several patches.
Where slight movement repeatedly opens a joint between materials, paintable flexible decorator’s filler may work better than rigid filler. It cannot correct structural movement. Cracks at plasterboard joints may require joint tape and compound instead of another skim of filler. Repair loose plaster first.
Traditional lime plaster needs special care. Incompatible modern fillers and impermeable coatings can trap moisture in older walls. Choose appropriate materials and consult an experienced conservation plasterer if unsure. See a guide to maintaining plaster in older homes for related upkeep.
What You’ll Need
Gather a filling knife, suitable filler, a soft brush or vacuum attachment, fine abrasive paper, a clean cloth and floor protection. Have primer ready if recommended. Wear eye protection and a suitable dust mask when sanding, and ventilate the room.
How to Repair Small Cracks in Plaster
1. Remove Loose Material
Brush away dust and flaking paint. Lightly check the edges with a filling knife, removing only crumbly material. A very fine crack may need slight, careful opening so filler can grip, but aggressive scraping creates a larger patch. Follow your filler’s preparation instructions.
2. Clean and Prepare the Surface
Vacuum the crack and wipe away remaining dust. Some porous surfaces benefit from light dampening or a specified primer; other fillers require a dry surface. Follow the product directions rather than soaking the plaster. Never seal over dampness before finding and fixing its source.
3. Press Filler Into the Crack
Load a small amount onto the knife and work across the crack, pressing firmly to fill the gap rather than cover only its opening. Scrape off excess, leaving the repair level or slightly proud. For deeper defects, apply thin coats within the manufacturer’s limits. Thick applications may shrink or crack.
4. Dry and Sand the Repair
Allow the filler to dry for the time stated on its packaging. Depth, humidity and temperature affect drying. Feel for ridges, then sand gently with fine abrasive paper until the patch blends into the surrounding plaster. Shine a light sideways along the wall to reveal raised edges, and remove dust before painting.
5. Prime and Paint
Spot-prime bare filler where recommended. Otherwise, porous patches may absorb paint differently and leave a dull mark known as flashing. Apply matching paint and feather it into the surrounding area. If existing paint has faded, repainting the wall from corner to corner often looks better than a small touch-up.
Example: A Crack Above an Internal Door
Imagine a narrow, unchanged line above a doorway. The plaster feels solid, there is no damp staining, and the door opens normally. Photograph the line, clean it, apply appropriate filler, sand after drying and prime before painting. That is a reasonable cosmetic approach. But if the line grows diagonally from the door corner or the frame begins to jam, stop filling and arrange an assessment. Location alone cannot establish whether a crack is harmless.
Why Plaster Crack Repair Sometimes Fails
Recurring cracks provide useful clues. Filler may fail because the surface was dusty, the product unsuitable or the movement continues. If a hairline returns after seasonal changes, monitor it and consider whether the joint needs flexible treatment or plasterboard tape repair. A widening crack needs investigation, not another thick coat of filler.
Keep rooms ventilated and avoid abrupt heating changes where practical. Following a leak, fix the cause and let the wall dry before redecorating. A guide to preparing walls before painting can help prevent visible patches around repairs.
Wall Crack Warning Signs
A cosmetic repair is inappropriate when cracks keep expanding, form stepped patterns in masonry or appear alongside newly distorted frames. Look for matching cracks outdoors. Dampness, crumbling surfaces and plaster separating from its backing also warrant attention. A qualified surveyor or structural engineer can investigate suspected building movement. A plasterer can advise on defective plaster once underlying concerns have been addressed.
Frequently Asked Questions
Can I paint over hairline wall cracks?
Ordinary paint rarely hides a visible crack for long. Clean and fill a stable crack first, then prime as directed. Crack-bridging coatings have limitations and should never conceal signs of movement.
Which filler works best for small plaster cracks?
For sound modern plaster, choose a fine interior filler approved for plaster. Moving joints and traditional lime surfaces may require different materials, so check the substrate before buying.
Do I always need to widen a hairline crack?
No. Very fine lines sometimes need gentle opening so filler bonds properly, but unnecessary scraping makes the finish harder to disguise. Follow the product instructions.
When should I contact a professional?
Seek advice if cracks widen, form diagonal or stepped patterns, occur on both sides of a wall, or accompany sticking doors, bulging plaster or moisture damage. A surveyor or structural engineer can assess movement; a plasterer can repair defective surfaces.
A Smooth Finish Starts With the Right Diagnosis
Filling plaster cracks works best when you consider their cause before smoothing the wall. For a small, dry and stable line, cleaning, suitable filler, patient drying and careful painting usually produce a tidy finish. Keep a record of uncertain cracks and watch for changes. Knowing when not to cover a crack is as valuable as knowing how to repair it.