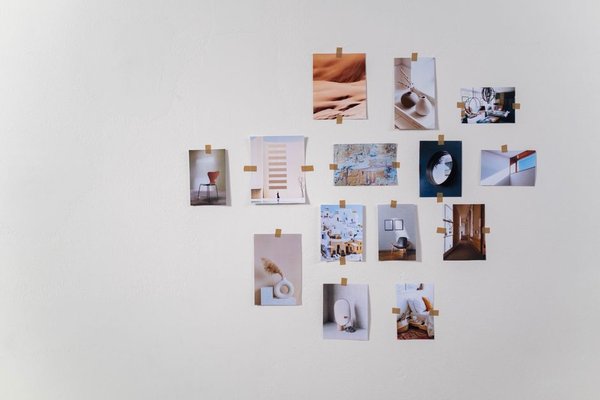
A successful gallery wall rarely begins with a hammer. The part that makes the finished display feel balanced is the planning that happens first: choosing a visual centre, deciding how much empty space to leave, and testing the arrangement before making holes. That matters even more in UK homes, where a wall may be modern plasterboard, solid masonry, or older lath and plaster. The same fixing method will not suit every surface.
The best gallery wall ideas therefore combine design with practical preparation. You do not need matching frames or museum-perfect symmetry, but you do need a layout that suits the wall, the furniture beneath it, and the fixings the wall can safely accept.
Start with the wall, not the frames
Look at the wall as part of the room. A gallery above a sofa, sideboard or bed usually works best when it relates visually to the furniture. Measure the usable width and height, then mark the approximate outer boundary with low-tack masking tape.
A useful approach is to keep the display comfortably narrower than the furniture beneath it. In a narrow Victorian terrace, for example, a compact vertical arrangement may feel more natural than a wide spread that crowds a doorway or chimney breast.
Decide whether you want a neat grid, a loose salon-style collection, or a layout built around one larger picture. Natural internal-link topics include wall art ideas, picture hanging height, and choosing artwork for a living room.
How to plan a gallery wall before making holes
The easiest way to test a gallery wall layout is with paper templates. Trace each frame onto kraft paper, old wrapping paper or newspaper, cut out the shapes, and label them. Tape the templates to the wall with a removable tape that will not damage the paint.
This step exposes problems that are hard to spot on the floor. You may find that the top edge climbs too close to coving, that a small frame disappears beside a large one, or that the whole arrangement needs to shift several centimetres.
Choose one visual anchor
Most picture wall ideas are easier to organise when one element acts as the anchor. It might be the largest print or the frame you want closest to eye level. Position that first, then build around it rather than trying to balance every frame independently.
Keep spacing deliberate
Consistent gaps make mixed frames look intentional. Around 5 to 8 cm between neighbouring frames is a practical starting point for many home gallery walls. Smaller frames can sit closer, while larger pieces may need more breathing room. The exact number matters less than keeping the spacing visually consistent.
Mix frame styles without creating clutter
A gallery wall does not need identical frames, but it helps to repeat something. You could use several black frames with one or two natural wood pieces, repeat a brass finish in different sizes, or keep all mounts white while varying the frames. Repetition gives the eye a pattern to follow.
If the artwork is colourful, simpler frames usually keep the display calmer. Monochrome prints can handle more varied timber, painted or metallic frames. Different art styles can still work together when they share a colour, subject or mood.
Choose fixings for the actual wall type
UK homes can hide very different wall constructions beneath similar-looking paint, so identify the wall type as accurately as you can and choose fixings designed for that material and the weight of the frame.
Plasterboard walls
Light pictures may suit purpose-made plasterboard picture hooks or fixings, while heavier frames generally need a fixing designed to grip or expand in the board, or a secure fixing into a timber stud where appropriate. Plasterboard anchors are sold specifically for pictures, but capacities vary by product and board thickness, so follow the manufacturer’s instructions rather than relying on a generic weight limit.
Solid masonry walls
Brick or block walls typically require drilling and an appropriate wall plug and screw. The drill bit, plug and screw should be compatible with the wall material and the load. Before drilling, consider whether cables, pipes or other services may be concealed behind the surface.
Lath and plaster walls
Older lath and plaster needs more care because brittle plaster can crack or detach if treated like modern plasterboard. For heavier items, locating sound timber behind the plaster can provide a more dependable fixing point. If drilling is necessary, work gently and avoid excessive impact. In a listed or historically significant property, use a conservative approach that protects original fabric.
Transfer the paper plan to the real frames
Once the templates look right, photograph the arrangement before removing anything. For each frame, measure the distance from its top edge to the actual hanging point on the back. Transfer that measurement onto the corresponding paper template and mark the fixing position.
Install the fixing through the template mark, remove the paper and hang the frame. This prevents errors caused by a wire or bracket sitting lower than the top of the frame.
Work from the anchor frame outward and check with a spirit level. Do not assume the ceiling or skirting board is perfectly straight.
A practical layout example
Imagine a 180 cm sideboard with a blank wall above it. Instead of filling the whole width, test a gallery roughly 125 to 140 cm wide, centred over the furniture. Start with one medium-large frame slightly off-centre, add smaller pieces around it, then use paper templates to adjust the gaps until the visual weight feels even.
If one side looks heavy, first try moving a smaller frame or adjusting the empty space around the largest piece. Often the problem is spacing rather than the number of artworks. This is why learning how to plan a gallery wall saves time later.
FAQ
How far apart should pictures be in a gallery wall?
About 5 to 8 cm is a useful starting point for many mixed-frame arrangements. Smaller frames can sit a little closer, while large pieces may need wider gaps. Consistency matters more than one exact measurement.
Should a gallery wall be centred on the wall or the furniture?
Above a sofa, bed, console or sideboard, centring it visually on that furniture often creates a more connected result. On an empty wall, use the architecture of the room and normal viewing position as your guide.
Can I hang a gallery wall on plasterboard?
Yes, provided you use fixings suitable for plasterboard and the weight of each frame. Check the fixing instructions and wall construction before drilling.
How do I make mixed frames look cohesive?
Repeat at least one feature, such as frame colour, mount colour, artwork palette or spacing. That shared element creates order even when sizes and styles vary.
Plan once, hang with confidence
The strongest gallery wall ideas are not necessarily complicated. A clear outer shape, one visual anchor, consistent spacing and the right fixing for the wall will do more for the finished result than buying a perfectly matched frame set. Test the arrangement with full-size paper templates, view it from across the room, and make your changes before drilling. The final display will feel more considered and be much easier to hang straight.